How to use AWS Lambda@Edge to modify CloudFront request headers
14th January, 2017 (updated 08th July, 2017)

Update 08th July, 2017
Today, AWS released the General Availability Release Candidate 1 of their Lambda@Edge feature. The most important changes are the following:
- The node version was switched from 4.3 to 6.10.
- The function timeout was drastically increased: From 50ms in the preview version to 100 ms (viewer facing) and 3,000 ms (origin facing).
- Origin facing functions may make network calls (e. g. to query a database).
- You can access the request object in response events.
- The number of concurrent executions was increased from 3 to 1,000 (20,000 by request).
This is great news for everyone who was struggling to elevate sophisticated applications to Lambda@Edge. However, one drawback remains: The deployment package size remains at 1 MB (compressed, but including all dependencies).
Introduction
On 1st December, 2016, Amazon Web Services announced their Lambda@Edge service, making it possible to invoke AWS Lambda functions directly at AWS CloudFront's edge locations. This gives us web developers the opportunity to inspect and modify viewer and origin requests and responses before they are handled by CloudFront or origin servers.
For tiny.pictures, being a real-time image processing service with integrated CDN service, this comes in extremely handy. That's why AWS accepted us for their limited preview that started on 13th January, 2017.
Use case
Among the many wonderful things that CloudFront's CDN offers there are also some drawbacks. A major one is that it is not possible to forward a request header to the origin server without also caching based on that header. This renders e. g. forwarding the user's User-Agent header impossible because there's a ton of different browsers out there and caching would be very inefficient.
To be able to benefit from the WebP image format's smaller file size compared to JPEG, we'd like to automatically convert JPEG images to WebP if the user's browser supports WebP (and only then). For that to work, our application servers handling the real-time image processing need to know if the user's browser supports that feature.
Until now, forwarding the User-Agent header was impossible due to many different user agents out there. Also, the Accept header, specifically designed for server-side content negotiation, is still getting pretty diverse when it comes to images.
With Lambda@Edge, we can now determine WebP support in a Lambda function, set a (boolean) header before it is handled by CloudFront and forward that header to our application server, resulting in only two different cached versions per image instead of a myriad.
Setup
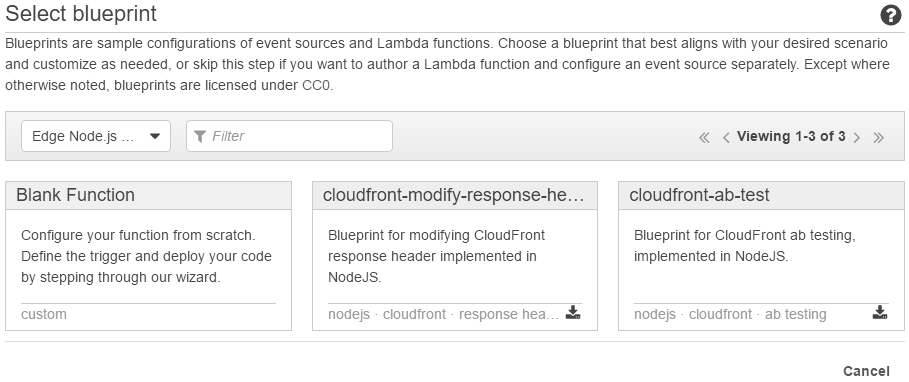
When Lambda@Edge becomes available to the public, you will be able to choose from a couple of blueprints when creating a new Lambda function. They are available under the Edge Node.js 4.3Node.js 6.10 filter. Quite obviously, this gives us the hint that our functions will be running in a Node.js environment in version 4.3 6.10, which is currently an LTS version. For our example, we chose a blank function.
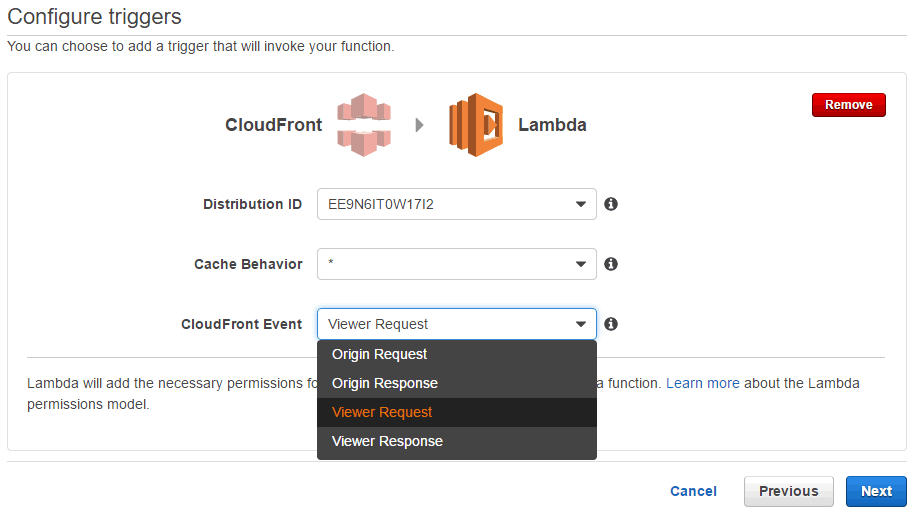
During the trigger configuration you are asked to choose when exactly your code should be run. The available options are (in chronological order):
- Viewer request
- Origin request
- Origin response
- Viewer response
Please note that the origin request and response may be skipped if the resource is already cached by CloudFront.
For our example we chose "Viewer request" as our trigger because we need to inspect the original headers sent by the user's browser and need to modify the headers before the request is handled by CloudFront.
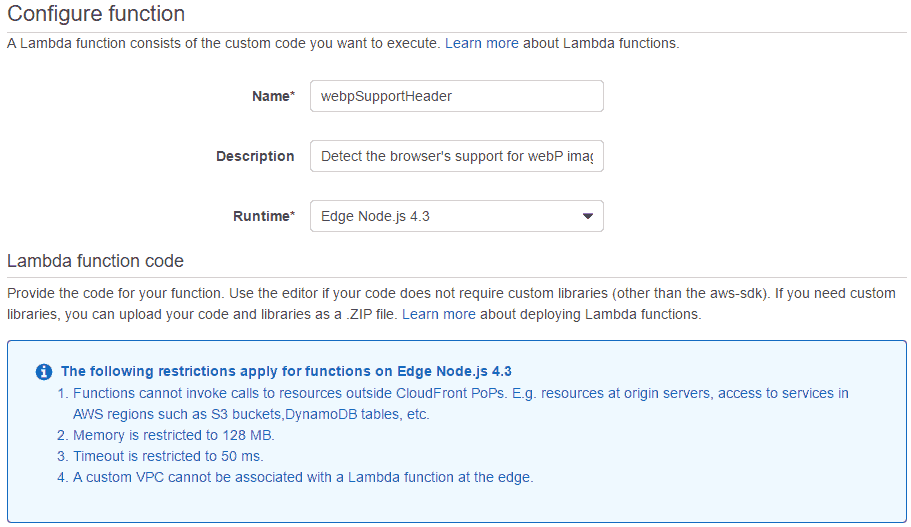
During the next step of the setup, CloudFront reminds you of some of the restrictions that apply to Lambda@Edge functions. For a complete list, please refer to the official documentation linked below.
The most important one is probably that – although the function is asynchronous – you cannot make any HTTP calls (Update 08th July 2017: Since version RC1, you can make HTTP calls in viewer facing functions with a timeout of 3 seconds). Thus, your code must be able to accomplish its task on its own, only using local libraries that have to be uploaded to Lambda along with the main code. Please read Creating a Deployment Package (Node.js) for more information on how to do that.
Code
Now we need to write a Lambda@Edge function that fits our purpose. Following our example, we implement a function that satisfies some basic tests:
- If there is no
User-Agentheader set, do not modify the request - If the user agent is Chrome in a major version that is greater than or equals 23, set the
X-Tiny-Pictures-WebPSupportheader to the empty string - If the user agent is Chrome in a major version that is lower than 23, do not modify the request
This is the test code.
import webPSupportHeader from './webPSupportHeader'

describe('lambda', () => {
    describe('webPSupportHeader', () => {
        beforeEach(function () {
            this.handler = webPSupportHeader.handler
            this.event = {
                Records: [
                    {
                        cf: {
                            request: {
                                headers: {
                                    'User-Agent': []
                                }
                            }
                        }
                    }
                ]
            }
            this.context = {}
        })

        it('should return the original request if no user agent is set', function (cb) {
            return this.handler(this.event, this.context, (e, request) => {
                expect(e).toBeNull()
                expect(request.headers['X-TinyPictures-WebPSupport']).toBeUndefined()
                return cb()
            })
        })
        it('should set header if Chrome in later version', function (cb) {
            this.event.Records[0].cf.request.headers['User-Agent'].push('Mozilla/5.0 (Windows NT 10.0; WOW64) AppleWebKit/537.36 (KHTML, like Gecko) Chrome/55.0.2883.87 Safari/537.36')
            return this.handler(this.event, this.context, (e, request) => {
                expect(e).toBeNull()
                expect(request.headers['X-TinyPictures-WebPSupport']).toBeDefined()
                return cb()
            })
        })
        it('should not set header if Chrome in earlier version', function (cb) {
            this.event.Records[0].cf.request.headers['User-Agent'].push('Mozilla/5.0 (Windows NT 10.0; WOW64) AppleWebKit/537.36 (KHTML, like Gecko) Chrome/22.0.2883.87 Safari/537.36')
            return this.handler(this.event, this.context, (e, request) => {
                expect(e).toBeNull()
                expect(request.headers['X-TinyPictures-WebPSupport']).toBeUndefined()
                return cb()
            })
        })
    })
})
By using the useragent library, we came up with a pretty simple and fast code to do just that.
const userAgent = require('useragent')

exports.handler = (event, context, callback) => {
    const request = event.Records[0].cf.request
    const headers = request.headers
    const userAgentString = headers['User-Agent'] && headers['User-Agent'][0] ? headers['User-Agent'][0] : null
    const agent = userAgent.lookup(userAgentString)

    if (
        agent.family === 'Chrome' && agent.major >= 23 ||
        agent.family === 'Opera' && agent.major >= 15 ||
        agent.family === 'Android' && agent.major >= 53 ||
        agent.family === 'Chrome Mobile' && agent.major >= 55 ||
        agent.family === 'Opera Mobile' && agent.major >= 37 ||
        agent.family === 'UC Browser' && agent.major >= 11 ||
        agent.family === 'Samsung Internet' && agent.major >= 4
    ) {
        headers['X-TinyPictures-WebPSupport'] = ['']
    }

    return callback(null, request)
}
Great. All tests passed. Now we can upload our file along with the node_modules folder as a zip file to Lambda. As it turns out, our function takes only 0.7 ms to run.
Trigger
It is possible to configure the trigger at any of the following two locations.
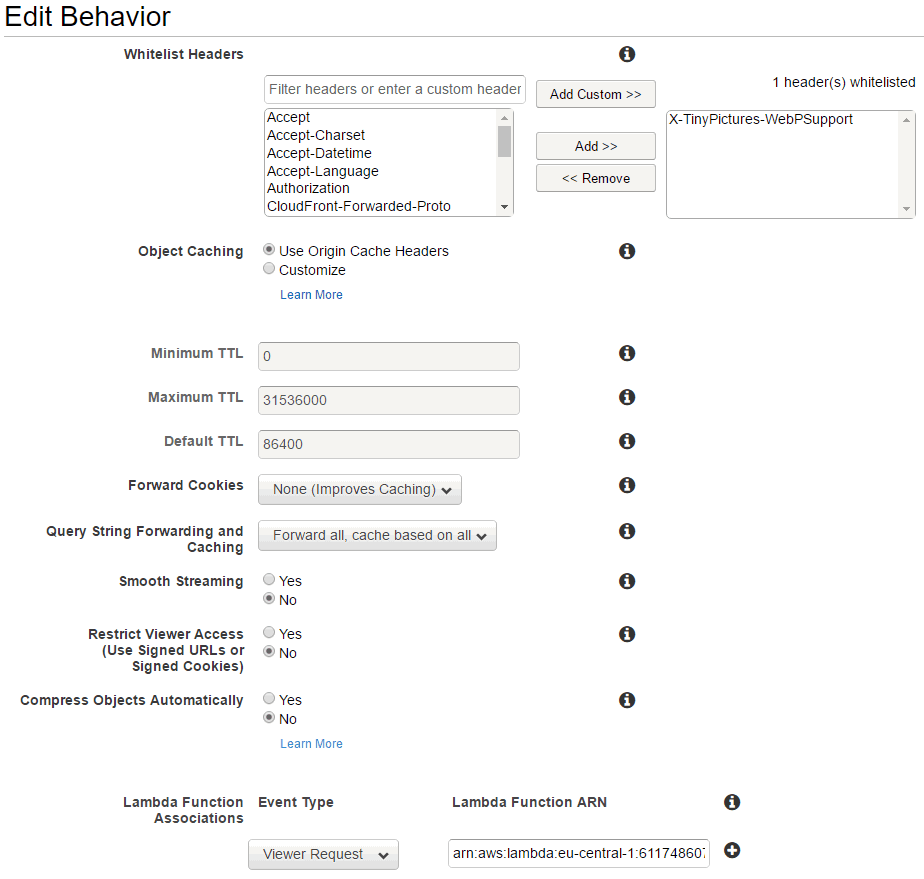
First, you can configure the trigger in your CloudFront distribution's behavior settings.
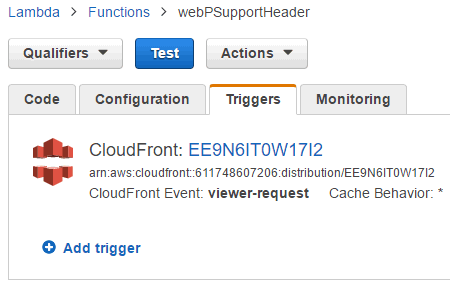
The second way to configure the trigger is on Lambda's "Triggers" tab.
Result
The source of the following image is a 1000 x 667 pixels JPEG with 825,212 bytes at 100 % quality. However, we run the image through our real-time image processing service to automatically deliver it from a CDN in the WebP format – depending on your browser's capabilities – at 80 % quality.
Check your browser's network tab to see which image format was loaded in the Content-Type response header.
The resulting WebP image is 99,126 bytes, a decrease in file size of 88 %!

Conclusion
AWS Lambda@Edge is a great way to leverage a fast and worldwide Content Delivery Network and at the same time stay flexible enough to modify requests based on arbitrary HTTP headers. There are a lot of use cases like what we did here, A/B testing, cookie inspection, redirects, etc.
Until now, this exciting feature is unique among the popular CDN services out there so you might actually get a step ahead of your competition by using it.
We will constantly update this page to keep track of future changes. Thanks for reading.
Feel free to share this article or use tiny.pictures to leverage our work for you.
Documentation
Covering Lambda@Edge usage with CloudFront, there are three parts of official documentation available:
- AWS Lambda@Edge (RC1)
- The documentation of the General Availability Release Candidate dated 07th July 2017
- AWS Lambda@Edge (Preview)
- The Lambda part of the documentation covering a general introduction and a simple setup.
- Using CloudFront with Lambda@Edge
- The more comprehensive CloudFront part of the documentation also covering the event structure and restrictions.